
How To Make Clay Models & Molds: A Beginner’s Guide
Table of Contents
Clay can be used in several different ways when making models and molds, and it is important to understand the difference before choosing which type of clay to use.
Clay can be used to make the original model from which a rubber mold is taken.
Clay can sometimes be used as the mold itself for simple or one-off castings, especially if you only want to take an impression of a moderately sized model or project that has no undercuts, creating what I would call a drop-out mold. Larger projects introduce considerably more challenges and are not something I would recommend for a beginner using this method. You also need to determine which clay to use, as some clays air-dry or harden, while others need to be fired in a kiln. My own experience has been with non-hardening modelling clays, and I used this method when I only needed a very small number of production pieces.
Those are two quite different uses, and choosing the right clay depends on what you’re trying to make.
A Little Early Clarification About Modelling Clay
When I was young in the UK, Plasticine was one of my favourite construction materials, along with Lego and Meccano. Looking back, perhaps it isn’t surprising that I eventually spent most of my working life making and building things.
Years later, when I was working professionally in the United States, I discovered that finding the modelling clay I was familiar with wasn’t quite as straightforward as I expected. Names such as Plasticine, Plastilina and Plastiline are used for similar types of non-hardening modelling materials, but they shouldn’t automatically be assumed to be exactly the same product.
I eventually found the type of material I needed at Glue Products in West Palm Beach, one of the specialist suppliers I used for my mold-making materials. It was supplied in blocks and, importantly for my work, remained workable rather than drying or hardening.
I used this type of non-hardening modelling clay for many different jobs. It could be shaped, altered and reused, which made it particularly useful in a production workshop where you might need clay temporarily rather than as part of the finished product.
I would often find beautiful but damaged items in the reduced sections of stores, or sometimes items that had simply been thrown away. If I thought an item had potential as a model, clay was one of the main materials we used to repair missing or damaged areas or add small details. Once we were happy with the repaired model, we could take a rubber mold from it. This was a simple and inexpensive way of turning something that might otherwise have been discarded into a usable model.
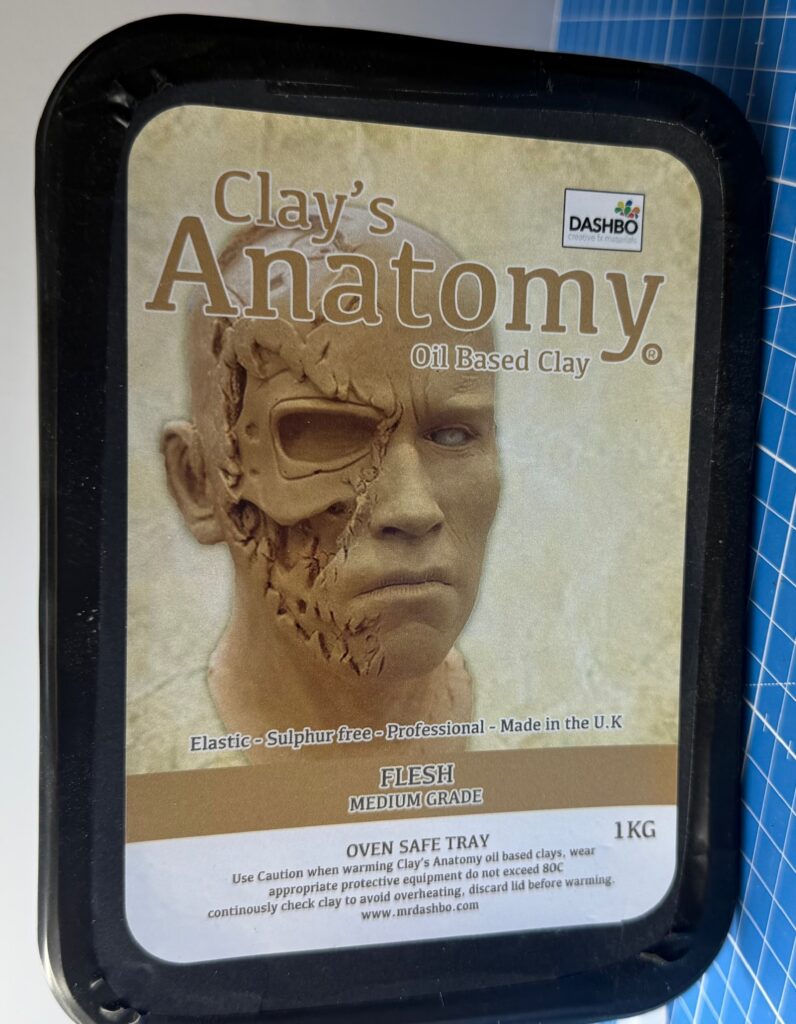
Today, suitable non-hardening modelling clays are much easier to find, with various types available from specialist art suppliers and major online retailers. Don’t rely solely on names such as Plasticine, Plastilina or modelling clay when choosing one. Look at the actual properties of the product and make sure it is suitable for what you intend to do with it.
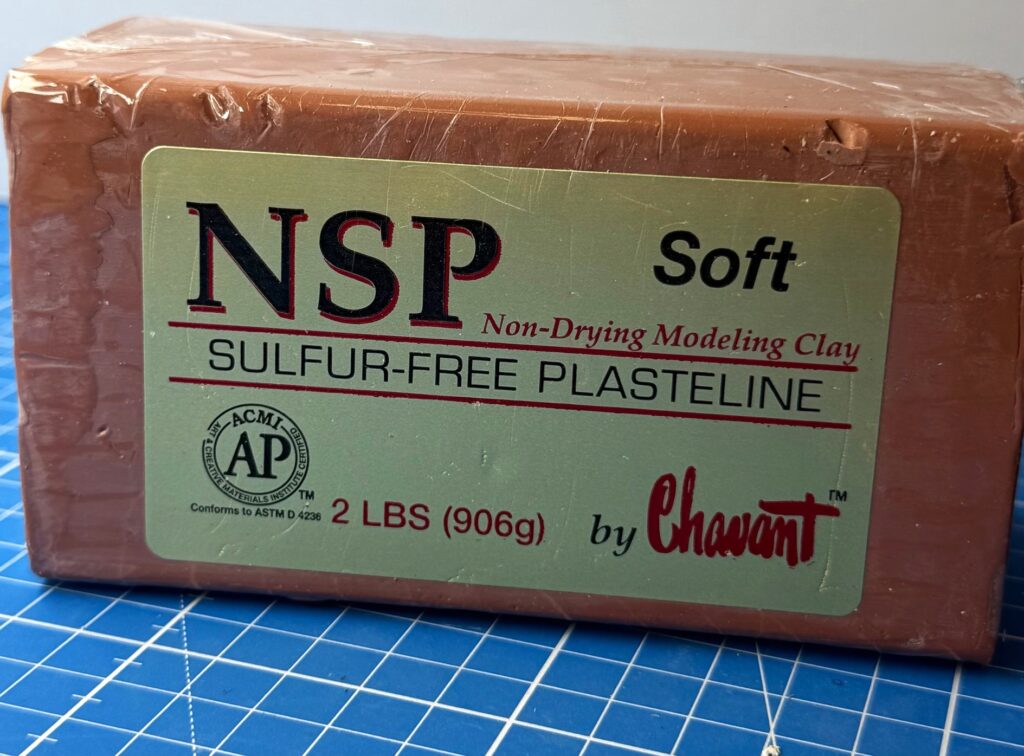
If the clay will come into contact with silicone mold rubber, compatibility becomes particularly important. Some modelling clays contain sulfur, which can interfere with the cure of platinum-cure silicone. For that reason, I would look specifically for a non-hardening, sulfur-free modelling clay when silicone rubber is going to be used against it.
Even when a product is described as compatible, testing a small amount of your clay and mold rubber together before committing to an important model is sensible. It is a cheap test compared with losing a model or a batch of silicone rubber.
The test itself is very simple. Press your finger into a small piece of the clay to make an indentation, then mix a small amount of the silicone rubber and pour it into the hole. Better still, if you already have another silicone pour in progress, take a small amount from that properly mixed batch rather than mixing a tiny test quantity, where accurately measuring the two components can be more difficult.
Leave the test for the normal curing period. I generally allowed 24 hours. Then remove the rubber from the clay and inspect it. If it has cured properly against the clay and there is no uncured, sticky or otherwise affected rubber at the contact surface, you have much better evidence that those particular materials are compatible before risking them on your main model.
I/We promote transparency. This post or site may contain affiliate links. This means only if you make a purchase through these links, not just by clicking, I/we may earn a small commission at no extra cost to you.
As an Amazon Associate, I earn from qualifying purchases
Other Types of Clay You May Come Across
Although my own experience of making clay models, has mainly been with non-hardening modelling clay, there are several other types of clay that beginners are likely to come across. They behave quite differently, so don’t assume that something sold simply as “clay” will be suitable for the same jobs. Especially when making clay models.
Water-Based Clay
Water-based clay is commonly associated with traditional sculpting and pottery. Unlike the non-hardening modelling clay I have described above, it loses moisture as it is exposed to the air and will gradually become firm and eventually dry.
This can be useful when creating the original clay models that you intend to mold, but drying also brings additional considerations. The clay models can shrink or crack as moisture is lost, particularly if it dries unevenly.
If you are working on a water-based clay model over several sessions, it normally needs to be protected from drying out before you have finished it.
For a beginner interested primarily in mold making, the important point is simply to recognise that water-based clay behaves very differently from the reusable, non-hardening modelling clay I used in my own production work. And remember it should dry fully before you get ready to make a mold of any of your clay models.
Polymer Clay
Polymer clay is another material you may encounter, particularly for smaller clay models, jewellery, ornaments and detailed craft projects.
Rather than simply being left to air-dry, polymer clay is normally hardened by heating it according to the manufacturer’s instructions. Once properly hardened, the finished pieces can provide solid master clay models from which a rubber mold can be made.
That makes polymer clay potentially useful when you actually want to keep any of the original clay models rather than reshape and reuse the clay afterwards.
Again, check the manufacturer’s information for the particular product you are using, especially before putting mold-making materials against the finished model.
Kiln-Fired Ceramic Clay
Traditional ceramic and pottery clays are another category altogether. These are formed while workable and can then be fired in a kiln to produce a hard ceramic object.
A fired clay object can certainly become a master from which a mold is subsequently taken, but pottery and ceramic firing are specialist subjects in their own right and aren’t what this beginner’s clay models and mold-making guide is intended to teach.
The important distinction here is that these clays shouldn’t be confused with the non-hardening modelling clay described earlier.
For the simple clay models and mold-making methods covered in this article, particularly temporary work, alterations, repairs and small production runs, non-hardening modelling clay is the material with which I have practical experience and the one I will concentrate on.
My Limited Experience With Fired Clay Molds
I have had some first hand experience with fired clay molds, although it was never a regular part of my own production work.
My first real exposure came through a friend who made jewellery. He had hundreds of small fired molds stored in what seemed like an incredibly small space. Seeing how he worked with them gave me a useful introduction to another completely different approach to mold making, particularly for small and detailed pieces.
I also gained experience using molding slick when we were making molds with molding plaster. I found the whole process fascinating and it taught me more about the different ways rigid molds can be produced and used.
These were valuable experiences, but they weren’t processes that we used regularly in my own production work. For that reason, I don’t intend to teach either method in detail here. They are specialist areas in their own right, and this guide is primarily about the simpler clay models and mold-making methods with which I have much more practical experience.
Using Clay With Rubber Mold-Making Materials
If you are making your original model from clay and intend to take a rubber mold from it, the clay models and rubber need to be compatible with each other.
This is one of those areas where I would rather spend a few minutes testing the materials than discover a problem after pouring an entire mold.
Preparing and Sealing the Model Before Using Any Rubber
There are spray-applied coatings that can be used to seal clay models before pouring any type of rubber mold, but compatibility with the particular rubber and the release agent that follows is equally important. Drying and curing times also matter for both the sealing coat and the release agent, where one is required.
Both coatings must be compatible with each other, as well as with the clay models and any other material exposed on the finished model, such as wood, plaster or polystyrene. This is why it is important to consider the complete combination of materials rather than choosing each product in isolation.
This can become quite a technical subject in its own right, so I am not going to try to cover every combination of sealer, release agent and rubber in this beginner’s guide. Check the manufacturer’s technical information for the particular products you intend to use and, if you have any doubts, test the complete combination before using it on any of your finished clay models.
Silicone Rubber
Silicone rubber is particularly good at reproducing fine surface detail, which means it can take an excellent mold from any well-finished clay models. It also means that scratches, fingerprints and even brush marks from a quality brush can be reproduced exactly as you made them.
Finish the clay models to the standard you want to see on the pieces you eventually produce. Put the extra time in here and it will pay dividends in the quality of every finished casting you take from the mold.
Depending on the type of clay you are using, a fine-pored sponge and a little water can work wonders on the final surface. However, make sure this method is suitable for your particular clay.
The main compatibility issue to be aware of is cure inhibition. Some modelling clays, particularly those containing sulfur, can interfere with the curing of some silicone rubbers. This is especially important with platinum-cure silicones.
For this reason, I only use sulfur-free modelling clay when any rubber is going to come into contact with it. It saves confusion for others in my shop. If I have any doubt about a particular combination or brand, I use the simple test described earlier in this article before risking the complete model and a much larger quantity of rubber.
The same general rules described above about sealing, release agents and compatibility with every exposed material in the clay models also apply when using silicone rubber.

I recommend this platinum-cure silicone because it is a Polytek product, a manufacturer whose mold-making rubbers I have used extensively over many years in commercial production. This 64 oz kit from Specialty Resin & Chemical is a practical size for getting started, with smaller and larger kits available on the same page to suit different projects.
Polyurethane Rubber
Polyurethane rubber can also be used to take molds from suitable clay models, but don’t assume that because one rubber works against a particular clay, another one automatically will.
The condition and porosity of any of your clay models also matters. If you are using a clay that dries or leaves a porous surface, it may need to be properly prepared and sealed before pouring the rubber. As explained above, this means considering the complete model, including any clay, wood, plaster, polystyrene or other exposed materials.
Polyurethane rubber was a material I used extensively in production mold making. It can be an excellent choice and, depending on the application, can also be considerably more economical than silicone.
However, I wouldn’t treat polyurethane as simply a cheaper substitute for silicone. The two materials behave differently, and the choice should be based on the clay models, the mold you need to make, the number of castings expected and the material you eventually intend to cast into it.
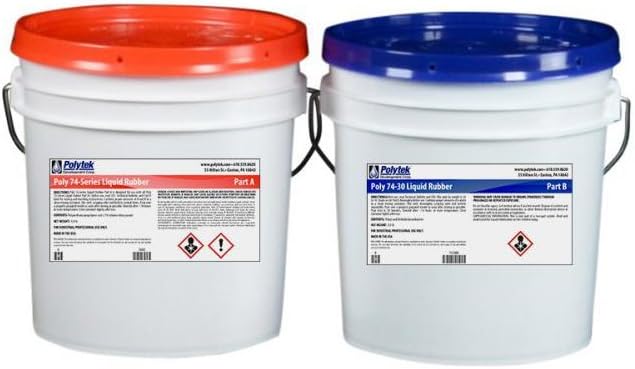
Polytek Poly 74-30 is a two-part polyurethane mold rubber that I have used extensively for production mold making. It has a Shore A30 hardness and a simple 1:1 mix ratio by weight. Poly 74-30 kits are available through Amazon.
Latex Rubber
Latex is another mold-making material that can be used with some clay models, although it is a very different process from pouring a silicone or polyurethane rubber mold.
Latex molds are normally built up in brushed or poured-on layers over the clay models, rather than being poured as one thick section. That can make the process considerably slower, but latex can produce very flexible molds.
In many applications, that flexibility means the finished latex mold will require a rigid support shell, often called a mother mold, to hold it in the correct shape during casting. Making support shells is another mold-making process in its own right and isn’t covered in this beginner’s guide.
I have worked with latex rubber, but for a beginner making the sort of molds we’re discussing in this article, silicone or polyurethane rubber are the materials I would recommend understanding first.
Understanding Labels on Liquid Rubber
If you’re new to silicone, polyurethane or other liquid mold-making rubbers, some of the information on the container can be confusing. Mix ratios, Shore hardness, working time, cure time and other technical details all affect how the material should be used and whether it is suitable for your project.
Our guide to Understanding Labels on Liquid Rubber explains the important information you’re likely to find on the product label and technical data, and what it means in practical terms when choosing and using a mold-making rubber.
Do You Need a Release Agent?
Don’t automatically apply a release agent simply because you are making a rubber mold from clay models.
Whether one is required depends on the particular clay, any final sealing coat applied to the clay models, the rubber being used and the manufacturer’s recommendations.
A release agent can sometimes solve one problem while creating another. Too much can affect the surface detail or the finish transferred to your mold.
My approach is to establish first whether the particular combination of materials actually requires a release agent. If it doesn’t, I wouldn’t introduce another material unnecessarily.
If you’re unsure, test the clay, any sealer or coating, the proposed release agent and the rubber together on a small sample before using that combination on your finished model.

Crafting Larger Clay Models with Other Core Materials
As clay models become larger, using solid clay throughout can become expensive, heavy and difficult to support. A core or armature made from other suitable, practical and inexpensive materials can greatly reduce the amount of clay required while providing additional support as the clay models are shaped.
My favourite core material is polystyrene. It is lightweight, reasonably strong and very easy to cut and shape. The downside is the mess. Cutting or sanding it can make your workshop look as though a snowstorm has just passed through.
Suitable core materials will depend on the size, shape and purpose of the model. Foam, wood, wire and other lightweight materials can all be useful, either individually or in combination. The important point is that the core is stable enough to support the clay models without moving or flexing while you work.
The clay may also need some help gripping the core securely. Smooth surfaces can sometimes be roughened or shaped before the clay is applied. Depending on what you are modelling, gradually building up the clay rather than applying one thick layer may also make the work easier.
I have used screws or nails pushed or screwed into the core material to act as miniature dowels, giving the clay something extra to hold onto.
If you intend to have a backdrop behind the finished clay models, it can be useful to put a temporary one in place at this stage. Make sure it can be removed relatively easily when you have finished with it. Depending on how the mold is designed, you may also find that the backer is useful during the mold-pouring stage.
Remember that anything incorporated into the to the clay models can affect later stages of mold making. If the finished clay model will be covered with a sealer, release agent or liquid rubber, consider whether any exposed core materials are compatible with those products as well.
Large clay models can quickly become more complicated than they first appear. Weight, support, undercuts, mold sections and the amount of rubber required all become increasingly important as the project grows. If that starts to happen, consider whether it would be possible to make the clay models and mold in separate sections.
There are several ways of approaching a sectional project, so I won’t go into those methods in detail in this post. If you are planning something like this and need some help in the meantime, please get in touch.
For a beginner, I would recommend gaining experience with smaller clay models and simple molds before attempting a large project. In fact, making something similar to your eventual dream project, but on a much smaller scale, can be an excellent way to learn what problems you are likely to encounter.
Many years ago, I made a mold of a rocky landscape because I needed several identical sections for a huge model railway layout I was building for a customer. Projects like that are a good example of where relatively simple clay models can eventually become part of something much larger.
Suitable Projects for Clay Models and Molds
Clay can be used in many different ways when making clay models and molds. For a beginner, the best projects are generally those with fairly simple shapes that allow you to learn how the materials behave before moving on to more complicated work. It also allows you to decide quite early whether this is a method you want to pursue without spending too much money.
Some practical examples include:
- Original clay models for rubber molds: Clay can be used to create an original model, or to modify an existing one, before making a silicone or other suitable rubber mold from it. This allows the finished design to be reproduced multiple times in the chosen casting material.
- Simple impression molds: Objects such as fossils, small rocks, textured surfaces, lettering and decorative details can be pressed into suitable clay to create an impression. You can also press clay over an existing model using a simple square wooden frame, which gives you an edge to screed the back of the clay level. I have found this particularly useful when taking an impression from something fixed to a wall or forming part of a much larger original piece. Depending on the materials involved, the resulting impression can then be used for a one-off casting or as part of another mold-making process.
- Jewelry molds and models: Small jewelry pieces are particularly suited to clay because of their size and the fine detail that can be produced. Clay can be used for a simple one-sided impression mold or to create an original model that will become the master for a more detailed and durable mold. Making a two-sided mold requires a little more explanation, so I will cover that separately. If you need help with one in the meantime, please get in touch.
- One-off molds: For suitable shapes without problematic undercuts, particularly those that only need to be poured from the underside when completed, clay can sometimes be used directly as a simple temporary mold. This can be useful when only one casting is required and making a permanent rubber mold would be unnecessary.
- Prototypes and experimental models: Clay allows shapes, proportions and details to be changed relatively easily before committing to a permanent model or mold. Clay has been used for many years in the automotive industry to develop scaled and full-size models of new vehicles, allowing shapes and details to be refined before committing to production.
- Alterations to existing models: Clay can be useful for adding details, filling unwanted areas or making temporary alterations to an existing model before taking a new mold. However, be careful when modifying somebody else’s original work if you intend to reproduce or sell the finished design. In my own commercial work in the US, our legal advisers required us to make significant changes where copyright could be an issue, and we worked to guidelines they provided. There is no simple percentage change that automatically makes a copied design legally safe, so even a small commercial operator should consider copyright and other intellectual property rights before reproducing someone else’s work.
- Components for larger projects: Small clay models or molds can produce repeated pieces that eventually become part of a much larger finished project, similar to the rocky landscape sections I mentioned earlier.
These are only examples. Once you understand how your particular clay behaves and how it works with the material you intend to cast or mold against it, there are many other possibilities.
Smoothing and Finishing a Clay Model
The finish you achieve on your clay model is important because a rubber mold, especially a good silicone rubber, can reproduce every fine surface detail, including scratches, tool marks and imperfections that you may not have intended to keep.
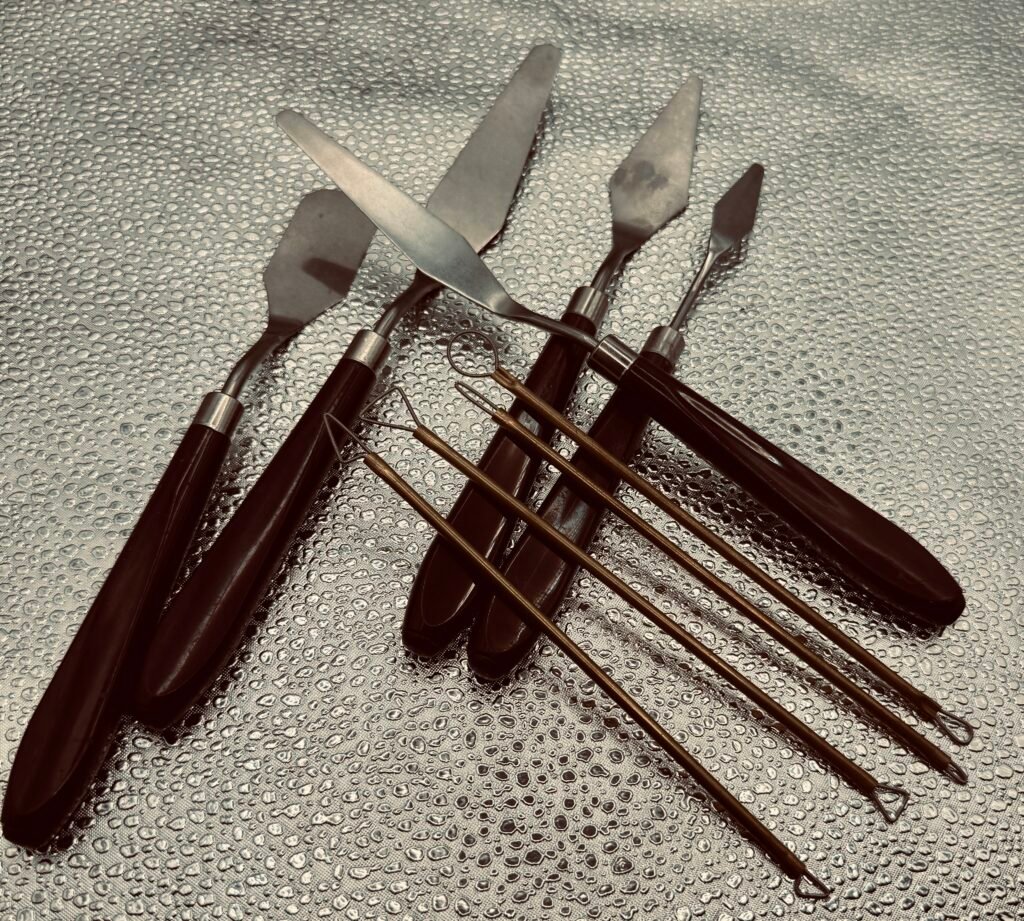
Start by getting the shape as close as possible using your normal clay-working tools. Wire loops, clay rakes, scrapers and other sculpting tools can be used to remove high spots, blend areas together and gradually refine the surface. I have a set of wire clay tools that I use for this type of work, and I have included a photograph to show the sort of inexpensive tools I mean.
Don’t expect the final smoothing process to correct an uneven model unless it was part of the intended design. Get the shape right first and then concentrate on progressively removing the smaller marks left by your tools.
Using Heat to Smooth Non-Hardening Clay
Some oil and wax-based modeling clays can be softened with gentle heat, which can help with shaping and surface finishing. The manufacturer of Monster Clay, for example, specifically describes heat as a way of softening and working the material.
However, different clays behave differently. Too much heat can soften the surface excessively and quickly remove details you have spent considerable time creating. If you haven’t used heat on your particular clay before, experiment on a spare piece first rather than on your finished model.
Liquid Smoothing and Polishing
There are also liquids that can be used to smooth certain oil and wax-based modeling clays. One interesting example is isopropyl myristate, which is recommended by the manufacturer of Monster Clay for smoothing and polishing its clay.
I haven’t personally used every smoothing liquid or solvent suggested for these types of clay, so I would not recommend treating them as interchangeable. A product that works well with one formulation may not give the same result with another.
If you want to try a liquid smoothing method, check what the clay manufacturer recommends and test it on a spare piece first. If the model will later be used with silicone rubber, also make sure any residue has completely evaporated or been removed and test the complete combination before committing your finished model to the mold.
How Smooth Do the Clay Models Need to Be?
That depends entirely on the finish you want on the casting.
A highly polished model may be appropriate for jewelry, decorative pieces or something intended to reproduce a very smooth surface. A rock, fossil, stone texture or other natural feature may need very little smoothing because those irregularities are part of the model.
The important thing is to remember that the mold doesn’t know which marks are intentional. If a scratch, dent or fingerprint is left on the model, there is a good chance your rubber mold will reproduce it.
Common Challenges When Working with Clay Models and Molds
Even a fairly simple clay project can present a few problems. Most are much easier to correct while you are still working on the model than after you have started making the mold.
- Clay becoming too soft: Oil and wax-based modeling clays can become softer as they warm up, particularly from your hands or a warm workshop. If the clay becomes difficult to shape or starts losing detail, stop working that area and allow it to cool before continuing. Some types of non-hardening clay can also be chilled slightly to make them firmer.
- Clay not holding securely to the core: If clay moves or pulls away from the core while you are shaping it, the surface underneath may be too smooth or there may not be enough mechanical grip. Roughening the core or using small screws, nails or other suitable supports, as mentioned earlier, can help.
- Cracking in water-based clay: Water-based clays can shrink and crack as moisture is lost, particularly if different areas dry at different rates and if your core is a porous material pulling the moisture out. Try to keep the moisture content reasonably even while working and follow the clay manufacturer’s recommendations for storage and drying.
- Losing detail while smoothing: It is very easy to keep working an area until some of the detail you wanted has disappeared. Work gradually, particularly when using heat or a liquid smoothing method, and test an unfamiliar technique on spare clay first.
- The model moving during mold making: Secure the model properly before you start applying or pouring rubber. A model that moves after the mold-making process has begun can be extremely difficult to reposition accurately. This becomes particularly important with taller, heavier or multi-part models.
- Rubber not curing properly against the clay: If the rubber remains sticky or uncured where it contacts the model, there may be a compatibility problem between the clay, rubber, sealer, release agent or another material being used. This is particularly important with platinum-cure silicone and certain clays. As discussed earlier, testing the complete combination of materials on a small sample can prevent an expensive mistake.
- The mold won’t release from the model: Undercuts are a common cause. A flexible rubber mold can cope with some undercuts, but that doesn’t mean every shape will release easily. Think about how the finished mold will actually come off the model before you start pouring rubber. A model that looks simple from the front can sometimes hide a troublesome undercut around the back or underneath.
Don’t be discouraged if your first of your clay models isn’t perfect. A small beginner project is partly about discovering these problems while they are still inexpensive and relatively easy to correct. That experience will make planning your next, more ambitious model considerably easier.
Frequently Asked Questions About Clay Models and Molds
What is the best clay for making a model for a silicone mold?
There isn’t one clay that is best for every project. For the type of model making discussed in this article, I generally prefer a non-hardening, sulfur-free modeling clay because it gives you plenty of time to shape, alter and refine the clay models. It can also be reused again and again for many other tasks around the workshop.
If you intend to use platinum-cure silicone, you must make sure the clay is compatible with it. Some sulfur-containing clays can cause cure problems with platinum-cure silicones, so I generally use a sulfur-free clay when the two materials will come into contact. If in doubt, test the combination first.
Can I use clay itself as a mold?
Yes, for some simple projects. Clay can be used for impression molds and some one-off molds where the shape allows the finished casting to be removed easily. It is particularly useful when making a permanent rubber mold would be unnecessary for a single casting.
Clay isn’t a replacement for silicone or other flexible mold rubbers when you need a durable mold for repeated castings.
Do I need to seal my clay models before making a rubber mold?
Not always. It depends on the clay, the rubber being used and the surface finish you want. Some combinations can be molded directly, while others may benefit from a suitable sealer or barrier coat.
Don’t automatically add a coating simply because somebody else used one. Check the recommendations for your particular materials and test the complete combination if you are unsure.
Do I need a release agent between my clay models and silicone rubber?
Not necessarily. Some combinations separate perfectly well without one. The need for a release agent depends on the clay, silicone and any sealer or coating already on the model.
Using an unnecessary release agent can also affect fine detail or the surface finish of the mold, so establish whether you actually need one before applying it.
Can I reuse non-hardening modeling clay?
Usually, yes. One of the advantages of non-hardening oil or wax-based modeling clay is that most clay models can often be reshaped, or broken down and reused many times.
However, clay that has become contaminated with rubber, release agents, sealers, solvents or other workshop materials may no longer be suitable for every future project. I keep this in mind before mixing used clay back into clean material.
Can I make a two-part mold using clay?
Yes. Clay is commonly used when setting up parting lines and dividing a model for a two-part or multi-part rubber mold. However, positioning the model, deciding the parting line and creating registration between the mold sections deserve a proper explanation of their own rather than a few sentences here.
I will cover two-part molds separately, but if you have a project you need help with before then, please get in touch.
Why didn’t my silicone cure where it touched the clay?
The most likely reason is a compatibility or cure-inhibition problem, particularly when using platinum-cure silicone. The clay itself, or another material such as a sealer, release agent or residue on the model, may interfere with curing.
This is why I recommend testing the complete combination of materials on a small sample before pouring an expensive mold.
How smooth should my clay models be before making the mold?
Only as smooth as the finished result requires. Jewelry or a polished decorative piece may need a very refined surface, while a rock, fossil, stone texture or other natural feature should retain the irregularities that make it look realistic.
The important thing is to remove accidental marks while keeping the detail and texture you actually want the mold to reproduce.
A Note on Methods
This article is based on methods and materials I have used during many years of model and mold making. There are often several ways to achieve the same result, and other experienced mold makers may use different techniques or prefer different materials. The methods described here are intended as practical guidance, particularly for beginners, rather than the only way a clay model or mold can be made.
Safety Considerations
Clay modeling itself is generally a straightforward process, but some of the additional materials and methods discussed in this article may require extra precautions. These include liquid mold-making rubbers, sealers, release agents, solvents, sprays, heat and cutting or sanding core materials such as polystyrene.
Always follow the manufacturer’s instructions and Safety Data Sheet (SDS) for the products you are using, including any requirements for ventilation and personal protective equipment.
For more general information about working safely with craft, mold-making and casting materials, we have a more detailed Safety in All Crafts guide on our sister site, Craft It All. It covers a wider range of materials and workshop activities than we need to repeat in this article.
Final Thoughts on Working with Clay
Clay is one of those materials that can be as simple or as complicated as you choose to make it. For a beginner, a small project is an inexpensive way to learn the basics of model and mold making without committing to large quantities of materials or expensive equipment.
As your experience grows, clay can become much more than a material for making models. It can be used for temporary molds, impression molds, parting lines, alterations, prototypes and many of the small problem-solving jobs that regularly arise around a mold-making workshop.
My advice is to start with something manageable, learn how your particular clay behaves and test unfamiliar combinations of materials before committing to the finished project.
If you have an clay models or mold-making projects that you’re unsure about, please get in touch. If I can point you in the right direction based on my own experience, I’ll be happy to help.
Author: Robby
All Crafts
I’m thinking of making small minimalist nativity scenes using quickrete. can you advise me how to get started using clay as a mold. A rough finish is what I’m looking for.
Thanks for the question. Yes, clay can certainly be used as a mould for this type of project, particularly if the slightly rough, handmade finish is what you’re looking for. I’ve used plasticine myself for simple moulds where a permanent reusable mould wasn’t necessary.
Before I suggest the best way of doing it, could you tell me roughly what size you intend the nativity pieces to be? Also, are you thinking of individual figures, or a complete scene that you want to cast repeatedly from a single mould?
That makes quite a difference to the method I would suggest. For a simple one-off casting, clay may be all you need. If you want to make several identical castings, it may be better to make your original in clay and then take a reusable rubber or silicone mould from it.
In the meantime, you may find my beginner’s guide to making a rubber mould at home useful. It covers the basic process and explains some of the different mould-making options, including silicone rubber.
[LINK: How to Make a Rubber Mold at Home – Beginner Guide]
If you come back with the approximate size, whether it’s individual pieces or a complete scene, and how many you hope to make, I’ll be happy to help you work out the simplest way of doing it.
Robbyeginner’s guide to making a rubber mould at home