How to Choose A First Mold Project and Get It Right: Beginner’s Guide to Rubber Mold Making
Choosing your first mold project became very real for me this past week as I began planning a new rubber mold for a resin piece. Even though I’ve been making molds and casting for many years, I still go through a step-by-step process at the start of every project. That made me realise how overwhelming it must feel for beginners—especially with the sheer volume of videos and advice online, much of it missing key steps or skipping past the basics.
Starting your mold-making journey should feel exciting, not confusing. That’s why I’ve put together this practical guide—to help you choose the right materials, prepare your workspace, and avoid common beginner mistakes. I recommend you start small, start smart, and start with the right model. This article will walk you through everything you need to confidently plan and pour your first rubber mold—without wasting time, energy, or materials.
Table of Contents
1. Start With the Model – The Heart of the First Mold & Project
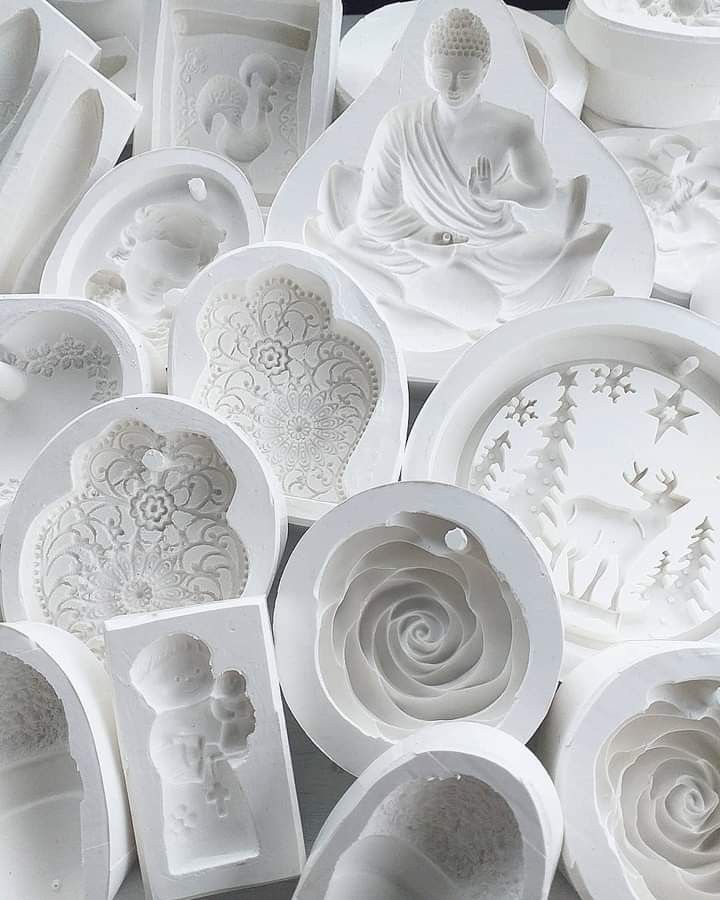
Before mixing any silicone or pouring resin, your first decision should be what you’re going to be your first mold. The object you choose—often called the “master”—sets the tone for every step that follows. A good first model simplifies the learning curve.
Key Qualities of a Beginner-Friendly Model For a First Mold:
- Small (under 10 cm / 4 inches)
- Solid surface (plastic, metal, wood, or ceramic)
- Flat base side for easy one-sided/pour molding
- Minimal or preferably no undercuts to avoid trapping silicone
- A smooth and non porous surface is far easier.
Good Starter Objects for a First Mold: ;
- Keyrings, pendants, or fridge magnets (don’t forget to buy magnets)
- Small figurines or ornaments.
- Drawer knobs, buttons, or medallions
- Small carved items like soapstone or woodcrafts
- A great place to look for suitable models is garage or yard sale. Or even on the clearance shelves in the bigger chain stores, I used to visit T J Max on a regular basis.
Don’t worry if the object has slight damage—chips and scratches can be easily made to disappear, they can be filled and smoothed before starting your first mold. When in doubt, go simple and symmetrical. You’ll build confidence without battling complex shapes.
Why Smaller is Better For a First Mold:
- Requires less molding material like silicone urethane rubber which means lower start out costs.
- Faster cure times
- Less intimidating to handle
- Easier to experiment and learn from mistakes without breaking the bank.
Spend time browsing garage or yard sales or even your own junk drawer it might surprise you what casting potential for a first mold lies there. And who knows, as a bonus, you might even find a long lost treasure at a garage or yard sale.
As an Amazon Associate, I earn from qualifying purchases.
This post contains affiliate links. If you buy through them, I may earn a commission at no extra cost to you.
2. Set Up Your Workspace – Safety and Simplicity
Once you’ve chosen a model, it’s time to prepare your workspace. Resin and silicone are messy and can permanently damage surfaces and tools if you’re not careful. I suggest an area you can protect and control easily.
What You’ll Need:
Phase 1: Building the First mold box
- A level surface — helps prevent lopsided molds
- A suitable base for your model to be fixed to with a smooth surface like a piece of melamine shelving from Home Depot or Lowes which can also be used for the sides of your first mold box.
- A mold box. You can buy these in an adjustable kit form on Amazon.
- Protective layer. A silicone mat is best but a bin bag, cling film, or painter’s thin plastic drop cloth will work too.
- Hot glue or silicone gun with glue sticks or tubes of silicone.
- Paper towels and isopropyl alcohol for cleanup
- A well-lit space — visibility reduces mistakes
Phase 2: Pouring the Rubber
• Gloves — nitrile, not latex as the nitrile offer stronger protection, less chance of ripping and a broader range of chemical resistance and zero chance of a latex allergy event.
• Mixing sticks and cups (plastic shot glasses work well)
If you can, work in a well-ventilated area like a garage, workshop, or near a window with airflow. While silicone itself has minimal odor, resin fumes can build up and irritate your lungs over time.
Ideal Conditions:
- Room temperature between 18–24°C (65–75°F)
- Low humidity (helps avoid cure issues)
- No pets or children nearby — safety first!
Set yourself up for success. A calm, clean environment leads to better results and more enjoyable crafting.
3. Decide: One-Time Fun or a Reusable First Mold?
Your project goal affects which materials you’ll use. Are you doing this as a one-time experiment or planning to make multiple resin casts?
Quick One-Off Mold:
- Lower-cost tin-cure silicone
- Disposable or recycled containers for mold box
- Minimal setup; good for testing the waters
Long-Term, Reusable Mold:
- Better-quality silicone (possibly platinum-cure)
- Stronger mold box (wood, rigid plastic, or LEGO)
- In some cases no old box is required if it is a shallow piece or you have used high Shore Hardness Rubber.
- Focus on durability and repeat use
Knowing which direction you’re heading avoids overspending and sets expectations. There’s no wrong answer—just pick what suits your needs right now.
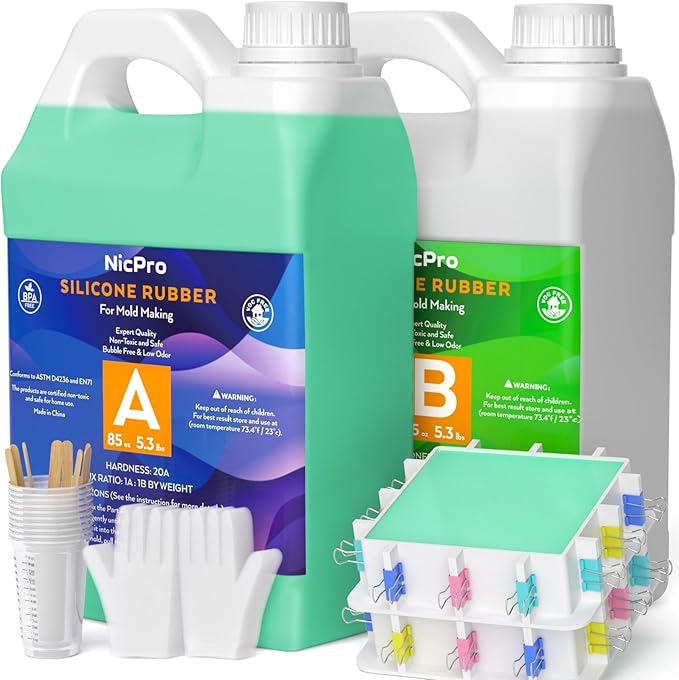
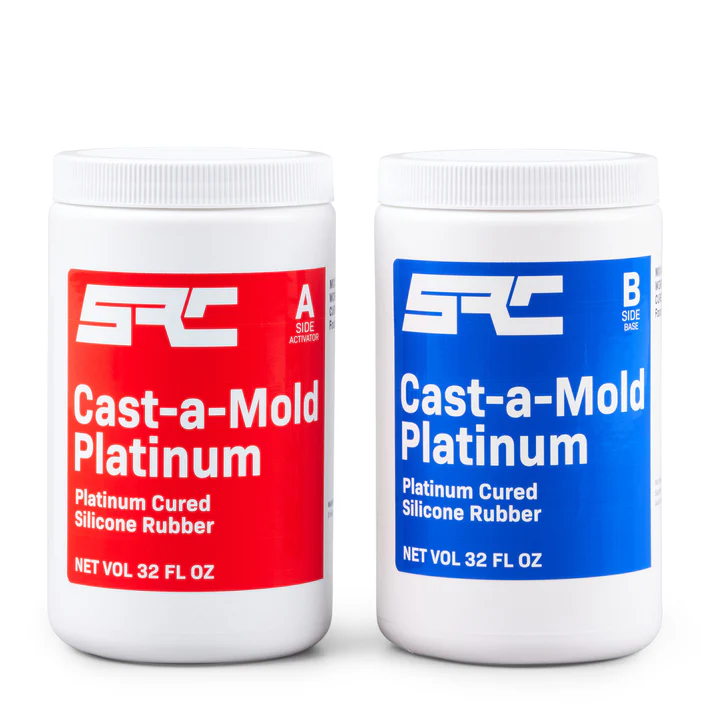
Below is Speciality Resin’s Platinum Cured Silicone 64oz kit available from Amazon
4. Why Silicone Is the Best For a First Mold Material (Even Without Heat)
You might wonder: is silicone really necessary if I’m just casting resin? The answer is a resounding yes—even if you don’t need heat resistance, silicone has unmatched advantages:
Advantages of Silicone:
- Flexibility: Easily removes even detailed casts
- Detail Reproduction: Captures fine textures and lines
- Reusability: Can be used dozens (or hundreds) of times
- Self-Releasing: No need for extra mold release with most resins
- Low maintenance: Clean with soapy water and the occasional spray of conditioning silicone spray.
Types of Silicone:
- Tin-Cure (Condensation Cure): Affordable, short shelf life, suitable for most non-food resin projects
- Platinum-Cure (Addition Cure): Expensive, ultra-durable, food-safe, and less shrinkage
Shore Hardness:
- 10A–20A: Very soft; good for complex shapes
- 20A–30A: Ideal for small decorative pieces
- 30A+: Firm, good for basic or shallow molds
Both Silicones and Urethanes follow the same Shore Hardness codes.
Budget silicone kits are widely available online. Just make sure it’s compatible with epoxy or polyurethane resin and follow the mix ratio exactly.
5. Building Your First Mold Box
You don’t need expensive mold boxes especially of this is a one off piece—simple household items often do the trick. The goal is to surround your object with silicone, sealed on all sides by using a practical amount of rubber.
DIY First Mold Box Ideas:
- Yogurt pots or takeaway containers
- Tupperware
- LEGO blocks on a base plate (sealed with hot glue)
- PVC pipe offcuts
- I use white board on a regular basis, as its easy to work with, a knife and glue gun is all that’s needed for most smaller molds.
Mold Box Tips:
- Leave 1.5–2 cm around all sides of the object
- Use clay, a cheap silicone caulk, or hot glue to seal the base
- Check for leaks by filling with water first (optional) or keep some modelling clay close by to plug any leaks when your pouring.
Pro Tip: Use dry rice to estimate how much silicone you’ll need. Pour the rice into your first mold box with the model inside, then measure it out into a mixing cup.
Keep the model fixed and sealed to the base of its box and the whole mold level and secure during the pour. If it floats or tilts, your mold won’t cure evenly or you will get rubber under your model.
6. Safety First: Working with Silicone & Urethane Rubber For Your First Mold
Silicone and urethane rubbers are safer than many casting materials, but they’re not risk-free. Urethanes in particular can cause skin and respiratory irritation if mishandled, and even some silicones contain additives that shouldn’t be taken lightly.
Safety Gear:
- Gloves: Use nitrile gloves to avoid skin contact with uncured materials.
- Ventilation: Always work in a well-ventilated area—urethane rubbers can emit vapors that irritate lungs.
- Eye Protection: Prevent splashes when mixing or pouring—goggles or safety glasses are highly recommended.
- Respirator Mask: Especially important when working with urethane or using aerosol release agents.
Handling & Cleanup:
- Skin Contact: Wash immediately with soap and water—do not use solvents on your skin.
- Spills: Wipe up uncured material with paper towels or baby wipes. Then clean the area with isopropyl alcohol.
- Disposal: Let rubber fully cure before disposal. Never pour uncured material down the sink or drain.
- Tool Safety: Label your tools and containers clearly. Never reuse mixing tools for food prep.
Even beginner-safe kits require responsible handling. Respect the chemicals, and you’ll enjoy years of safe, successful mold making
7. Your First Mold Pour – Plan It Like It Counts
Your first mold pour isn’t a throwaway—it matters. In fact, good planning goes further than guesswork. A well-chosen model, properly sealed mold box, and accurate measuring can help you succeed on the first try—and recover gracefully if anything needs adjusting.
Before You Pour
- Double-check your first mold box especially, for possible leaks
- Make sure your model is secured and sealed properly
- Use release agent if required by your rubber type—not just on your model, but also on the model surround and base
- Measure by weight, not volume, unless the product specifies otherwise
- Mix thoroughly and slowly—scrape the sides and bottom of your container, and avoid whipping in air
Pouring Your Silicone or Urethane Rubber For Your First Mold is Very Important.
- Pour slowly from one corner and let the rubber rise naturally to reduce trapped air
- Urethane rubber has a shorter working time—mix and pour without delay
- A heat gun may be used sparingly to help remove surface bubbles
- While vacuum chambers and pressure pots are often mentioned, they are not essential for many beginner projects. A careful pour with fresh product is usually sufficient—especially if your final cast can handle minor imperfections or light post-finishing
After Curing
Once the rubber is fully cured (refer to the product’s demold time, not just pot life):
- Inspect for missed detail, bubbles, or incomplete cure
- Check that the mold feels uniform and flexible throughout
- If issues occurred, a well-prepared model and box will usually allow a second pour without needing to rebuild everything
When you’re ready to begin casting resin into your mold, refer to our separate guide: Tips & Help about What to Expect https://resincentral.com/resin-crafting-basics-a-comprehensive-guide/
Or some inspiration from this post. https://resincentral.com/creative-resin-crafting-ideas/
Don’t aim for perfect—aim for solid and repeatable. Each mold gives you a chance to improve, and good setup lets you keep going even if adjustments are needed.
Frequently Asked Questions
Q: Do I really need a pressure pot or vacuum chamber to make my first silicone mold?
A: Not necessarily. If you’re using fresh product and pouring carefully, most small beginner molds don’t require pressure casting. Minor bubbles are often manageable with finishing techniques.
Q: What’s the biggest mistake beginners make when pouring molds?
A: The most common mistake is incorrect mixing—either by using the wrong ratio or failing to mix thoroughly. This can lead to soft spots or incomplete cures.
Q: Can I reuse my mold box if the first pour doesn’t go well?
A: Yes. If your mold box is well-built and your model is unharmed, you can clean up and pour again without rebuilding everything from scratch.
8. Final Thoughts: Confidence Over Perfection
It’s easy to get stuck trying to make your first mold flawless. Don’t. The goal is to learn, practice, and grow your skills—not to create a masterpiece on day one. Rome was not built in a day.
Here’s what matters:
- Choosing a model that’s simple and small
- Setting up a clean, safe workspace
- Using the right materials, starting with silicone
- Respecting safety rules
- Taking time to test and learn from each step
Silicone molds are an investment in your skills and creativity. One good first mold can lead to dozens of resin items. The better your first experience, the more likely you are to keep going.
So breathe, pick a simple project, and go for it. Your creative journey starts with one pour—and that first imperfect cast will soon be a stepping stone to beautiful, polished results.
Contact Us
We hope you found this information on your first mold helpful! If you have any questions or need assistance, feel free to reach out. Please note that due to government regulations, you’ll need to sign in and confirm your message. We apologize for any inconvenience.
Author: Rob
Ps. This is the company that taught me how to build this site and 3 others in 6 months, they keep their promises.
