Exploring the Versatility of Casting Resins
Table of Contents
There are many epoxy resins on the market today, but in this article, the focus is on one of the best resins for deep pouring.
Casting resins are incredibly versatile and can be used in various applications, making them a favorite among hobbyists and professionals alike. So whatever reason brought you to this page today, you should find something here of use.
Figurine Casting and Miniature Model Making
Casting resins are perfect for creating detailed figurines and miniature models. Their ability to capture fine details makes them ideal for hobbyists who enjoy model making. Whether you’re crafting a tiny soldier or a detailed landscape, casting resins provide the precision needed. But you must have great quality silicone molds for resin crafts too.
I/We promote transparency. This post or site may contain affiliate links. This means only if you make a purchase through these links, not just by clicking, I/we may earn a small commission at no extra cost to you.
As an Amazon Associate, I earn from qualifying purchases
Jewelry and Artwork
Jewelry makers often use casting resins to create unique pieces. They use their silicone molds for most of these types. The resin can be colored, embedded with objects, or left clear to showcase intricate designs. Artists also use resins to create stunning pieces of art, from abstract sculptures to detailed paintings with a glossy finish.
Bar Tops and Countertops
One of the most popular uses of casting resins is in the creation of bar tops and countertops. The resin provides a durable, glossy finish that is both beautiful and functional. It can be poured over wood, concrete, or other materials to create a seamless, protective layer.
Feature Encapsulations
Casting resins are excellent for encapsulating objects. This can include anything from flowers and coins to insects and other small items. The clear resin preserves the object and creates a stunning display piece.
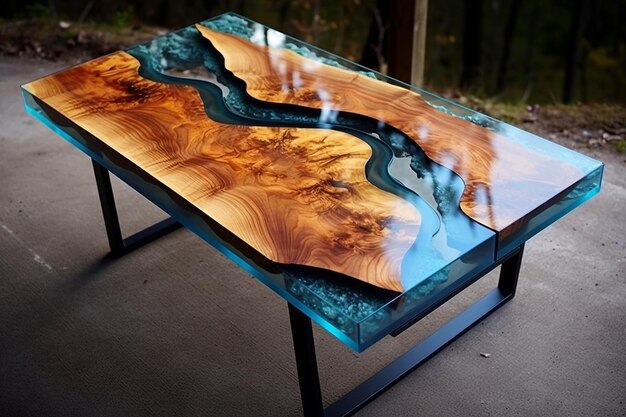
River Tables and Other Table Projects
With the popularity of various types of table projects, such as river tables, casting resins have become very relevant. These tables often feature a clear or colored resin poured between pieces of wood, creating a river-like effect. The resin not only adds beauty but also provides a durable surface.
Coloring and Special Effects.
With so many colored pigments available for resins, any color or combination is possible. Marbling effects are very popular and currently in fashion, especially with river resin projects showcasing this technique.
A little practice is needed to get the right color combinations and methods down pat. There are also metallic flakes and fluorescent additives available for resins, and adding semi-precious stones is another option.
Epox-It Deep Pour – Deep Pourable Epoxy Resin for Tables, Large Castings and Deep Pours.
Epox-It Deep Pour epoxy casting resin is a versatile, high-gloss resin with a crystal-clear finish and easy 1:1 mix ratio by volume. You can easily add pigments, dyes, and powders for vibrant results.
Epox-It Deep Pour is a casting epoxy and is not the proper material for sealing coats, tumblers or projects that require a coating less than 1/4″ thick. Those applications benefit from using an appropriate coating epoxy such as our Epox-it 80.

What Is Epoxy Resin For:
Making clear epoxy resin table tops,
Epoxy resin bar tops, with or without capsulations.
Clear epoxy resin over concrete countertops and live edge tables
Encapsulating and doming decorative items
Epoxy resin for art projects
Epoxy resin jewelry making
Making figurines and other models
The manufacturing of prototypes is a quick and easy way to create durable parts.
Pouring river tables,
Creating custom knobs, handles, and other hardware.
Features:
Delivered (USA) directly from the manufacturer, so you receive fresh material each time.
Easy 1:1 mix ratio by volume
Thick pours, up to 2″ thick fr each layer.
Self-leveling
Low odor and exotherm
Blush, water and UV resistance with added UV inhibitors
Easy to follow instructions
Low viscosity formula with superior air release to avoid bubbles
Complies with the FDA Code of Federal Regulations 177.2600 for indirect food contact
Compatible with most pigments, dyes, and powders
Working time of 45 minutes
Cure time of 24 to 72 hours depending on casting thickness

Buy Epoxy Resin, Sizes Available:
Click here for more info on 16oz. kits 2 x 8oz
Click here for more info on 32oz. kits 2 x 16oz
Click here for more info on 1 Gallon kits 2 x ½ Gallons
Click here for more info on 2 Gallon kits 2 x 1 Gallons
Click her for more info on 10 Gallon kits 2 x 5 gallons
Specifications
Mix Ratio 1:1 by volume
Working Time 45 minutes
Demold Time 24-72 hours
Shrinkage .001
Color Clear
Hardness 80-D
Viscosity 600cps
Step by Step Instructions.
What Is Epoxy Resin For? Below you can find a complete step-by-step guide showing how to use it correctly for various dimensional projects,
Mixing Resin and Hardener:
1, Thoroughly mix the resin and hardener using a flat-sided stir stick.
2, Scrape the sides and bottom of the container to ensure proper mixing.
3, Avoid whipping in excess air, as this can affect curing.
4, Incorrect mixing may result in a soft or sticky product.

Coloring Epoxy Resin
- 1, Coloring resins can take a little practice, especially for marbleising effects. But for standard coloring add your pigments after you have mixed your 2 part resin thoroughly.
- 2, Different pigments and manufacturers mean that they can vary in intensity and possibly instructions. So please read each one carefully.
- 3, It is probably easier to start out with liquid pigments and to carry out a few trials first if new to the process.
- 4, Measure, by drops or other means and record both the pigment quantity and resin used. You can then with some simple calculations scale up the amounts for bigger pours.
- 5, I recommend making up a little chart for quick reference and to record what you used and for what piece you poured.
Casting Thickness:
2, Overheating can cause yellowing, cracking, or distortion.
1, Do not exceed the recommended casting thickness.
2, Avoid scraping out the last few ounces from the mixing container to prevent soft spots.
Storage And Environment
1, Epox-It Deep Pour has a 6-month shelf life when stored properly.
2, Close containers immediately after use and store at room temperature.
3, Prepare a dust-free, well-lit mixing and casting area with adequate ventilation.
4, Maintain room temperature (65-75°F) for both the casting area and the epoxy.
Safety Precautions:
1, Wear recommended safety equipment (rubber gloves, eye protection, and apron).
2, Have all tools and equipment ready for use.
3, Suggested tools include mixing cups, stir sticks, rags, drop cloth, tape, foam brushes, resin, plumbers torch, scale, level, and lacquer thinner for cleanup.
Table Preparation:
1, Place a drop cloth under the table or work area.
2, Ensure the table is level.
3, Wipe the table top with a damp rag and let it dry completely.
4, Create a barrier using wood covered in Tyvek tape or aluminum tape to prevent leakage.
Cure Time:
1, Cure time depends on working temperatures and casting size.
2, Larger castings cure in 24 hours; medium and smaller castings take 48 to 72 hours.
3, Full cure occurs in 5-7 days.
Casting Guidelines:
1, Cast up to 2″ deep for projects less than 3″ wide.
2, Subsequent pours of 2″ can be made if casting is wider.
3, Wait 5-6 hours between pours.
4, Lightly sand the top and wipe with denatured alcohol if waiting more than 3 days between pours.
Additional Thickness Recommendations:
1, Projects up to 6″ wide can be cast up to 1″ thick per pour.
2, Projects greater than 6″ wide can be cast up to 3/4″ thick per pour.
3, Follow similar guidelines for subsequent pours.
DO NOT Cast Over 1 Pint (16oz) of Material at a Time:
1, Subsequent pours can be done once the previous pour has cooled and the material is hard to the touch.
2, If waiting more than 3 days between pours, lightly sand the top and wipe with denatured alcohol for good adhesion.
River Table Mold Preparation:
1, Create your mold using wood or MDF board.
2, Apply Tyvek tape on the inside and bottom of the frame to prevent epoxy from sticking.
3, Seal the wood or use carnauba paste wax or a release agent to prevent sticking.
4, Fill cracks or voids around the frame with silicone caulk.
Workspace Temperature:
1, When pouring your river table, maintain a workspace temperature between 65-75°F.
2, Cooler temperatures work better for larger pours.
Imperfections and Final Seal Coat:
1, If imperfections are visible after curing, apply a final seal coat of Epox-It 80.
2, Alternatively, use Epox-It Deep Pour (minimum thickness of 1/4″) applied within 72 hours.
3, When waiting more than 3 days between pours, lightly sand the top and wipe with denatured alcohol for good adhesion
Casting Removal:
1, Wait 48-72 hours before removing your casting from its frame.
Remember to follow these instructions carefully to achieve optimal results!
Contact Us:
We hope you find the information useful on how to use epoxy resin, but if you have any questions or need help, send us a message. You do have to sign in and confirm these days to comply with government rules. Sorry for the inconvenience.
Rob
Ps. This is the company that taught me how to build this site and 3 others in 6 months, they keep their promises.
